Scratchbuilding the ZEAF from Gerry Anderson & Christopher Burr's Terrahawks
 |
The 'Terrahawks' series began with a good initial selection of spaceship and vehicle designs, but it quickly became neccessary to introduce a new smaller spacecraft to get various alien characters from Mars to the Earth quickly without launching a massive fleet of starships. As a result a small fast one-man ship was created called the 'Zelda Earth Atmosphere Fighter' .... or ZEAF for short. The craft was designed and built by model maker John Lee and became an often featured vehicle throughout the series, although its appearance was altered twice to change what seemed to be a robotic vehicle into something that was clearly a piloted ship, and then a small rebuild to give it a wider two-person cockpit. |
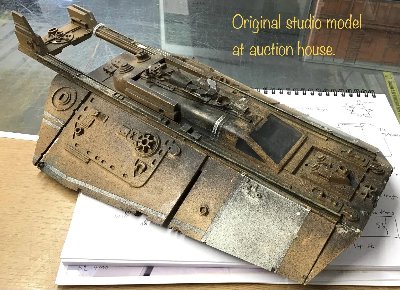
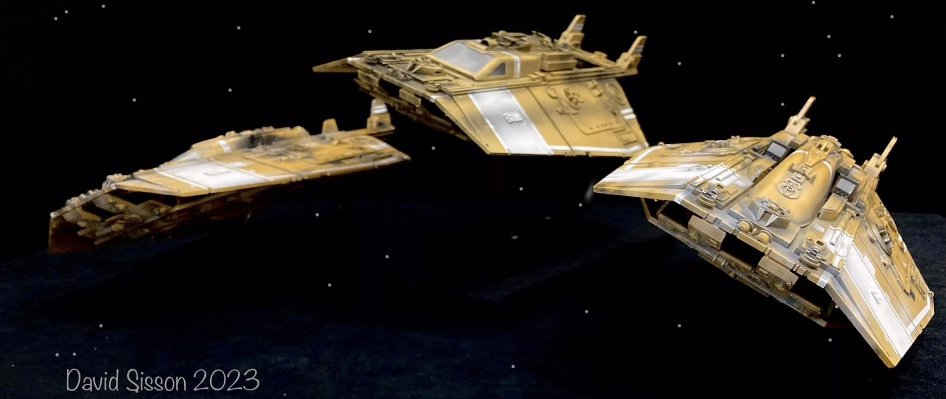
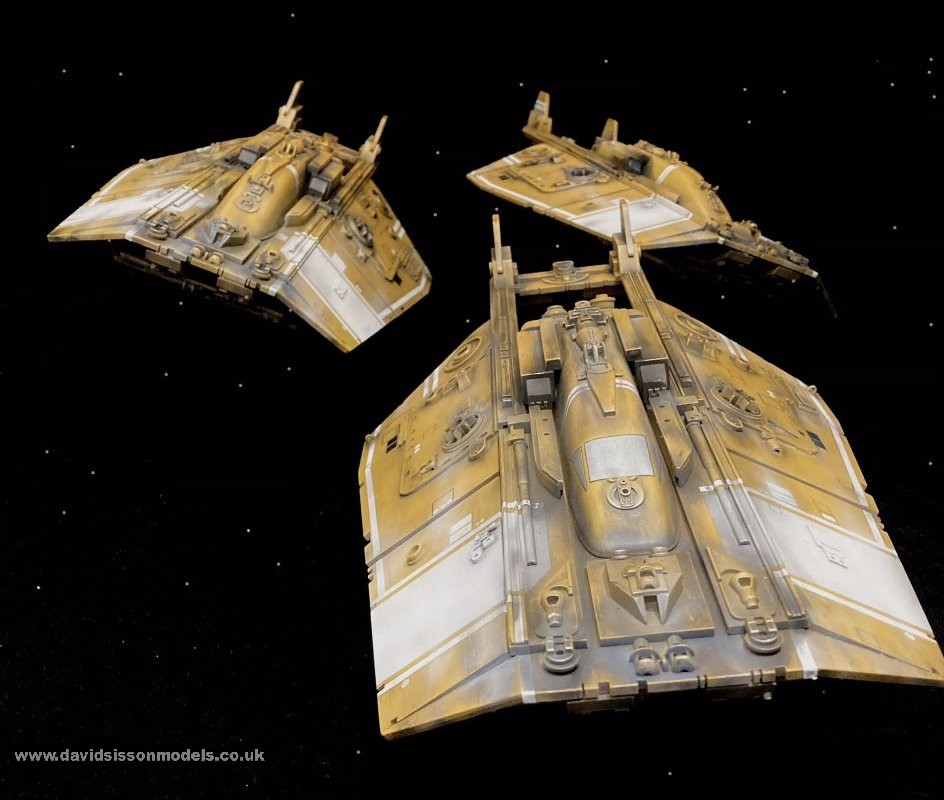
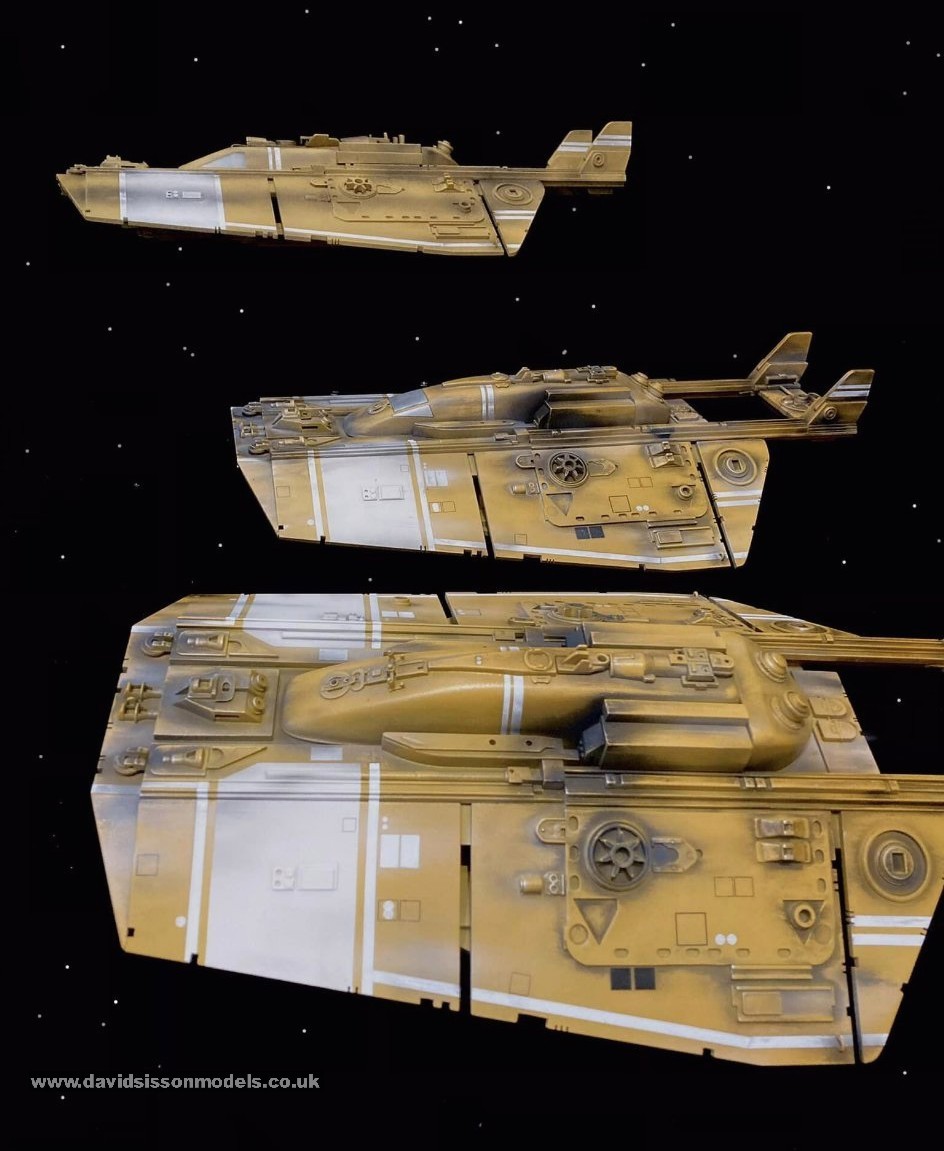
The ZEAF quickly became one of my favourite models, but unfortunately because it wasn't originally designed from the outset of the series there was a serious lack of information and photographs of it in any printed or online publications. This meant that I could not really begin to blueprint it, or build a proper replica of it, although I did try to mock it up in cardboard just to see if it was possible, but there were just too many unknown details. However this all changed in 2020 when the original model, together with many others, surprisingly turned up at auction and I was able to get to get my hands on it and have a very good look at all those unknown areas of detail. Because I had failed to buy the original model (which sold at over £4000) I decided to cheer myself up by scratch-building all three different ZEAF variants, original design. slightly dirtier and modified with painted windows, and it's current incarnation the more modified twin-seater seen today (Picture above left). |
 |
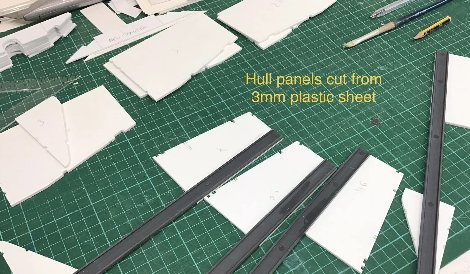 |
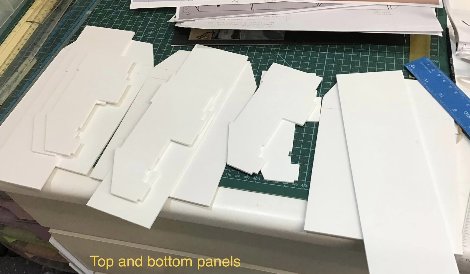
| The basic construction of the original model was 1/8th Perspex. I am not too fond of that material and so I used 3mm Plasticard sheeting which is far easier to cut, and I just ordered some large A3+ sheets off ebay. There are also a number of parts from the plastic supply company EMA which had to be ordered, note dark grey plastic channel strips above that hold the angled side fins in place. You also have to ask them for small plastic Ladder Clips which only they stock but don't seem to advertise in their catalogues. |
 |
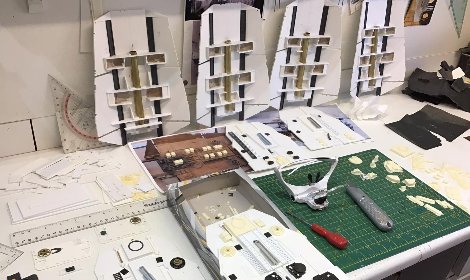 |
| Above left: In my enthusiasm I decided to make five models, three for myself, one for the original model builder (John Lee, who had been asking me to make him one for years) and one to sell to recover some of my costs. In the end this proved too much effort and I quickly forgot about the fifth one, but I did use the hull pieces to create a mock-up to fine-tune how the parts would fit together, adjust the side angles, and for paint testing purposes. |
 |
 |
 |
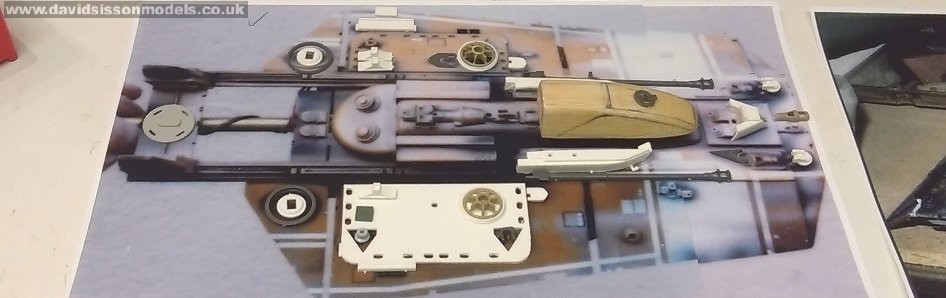
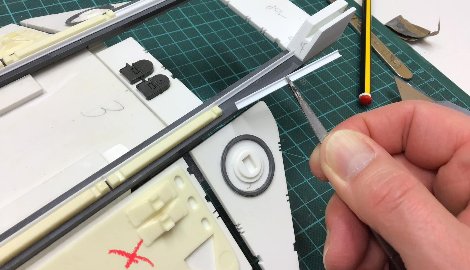
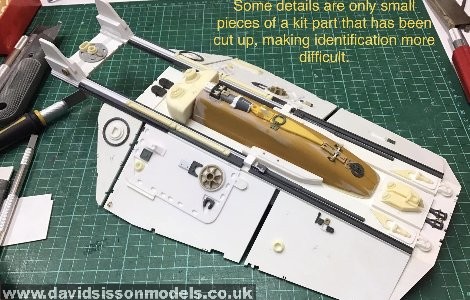
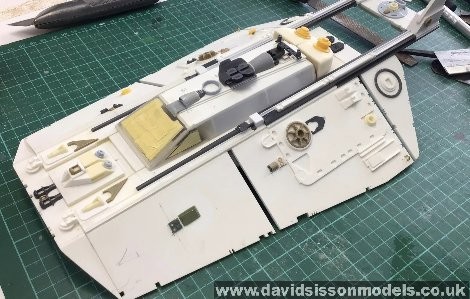
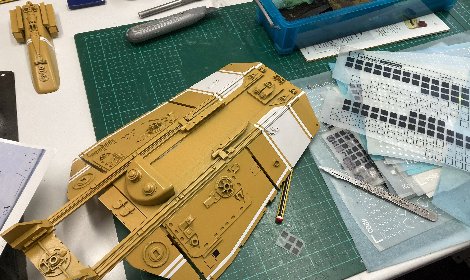
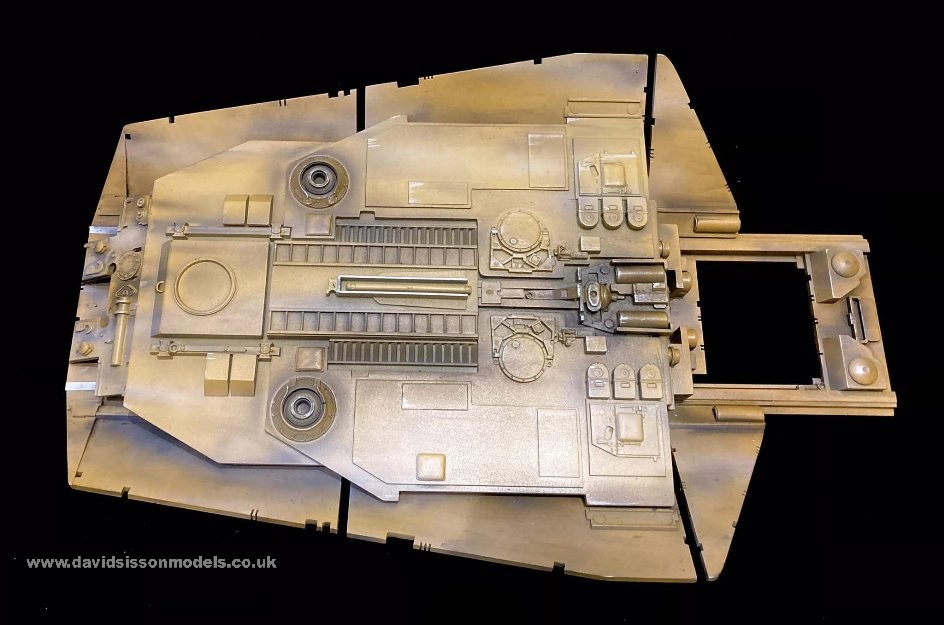
| This model features a great many model kit parts, especially on the bottom panels. Luckily other model makers had identified many of these pieces so I was able to source over 90% of the pieces and make copies the unknown ones. As I was making four models I did have to make moulds and cast up duplicate parts but even so the cost of the various kits was rather high. Some kit parts on the model are not whole pieces, but rather small selected sections, which does rather hinder identification. There are lists of these kits on my Facebook page, mostly Tamiya 1/35th scale military kits and some Airfix ones. |
 |
 |
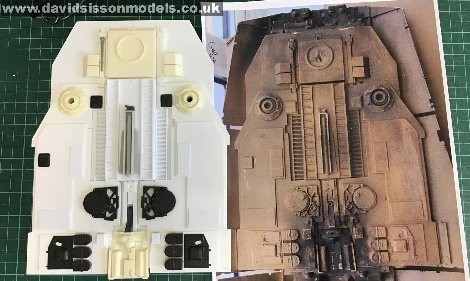
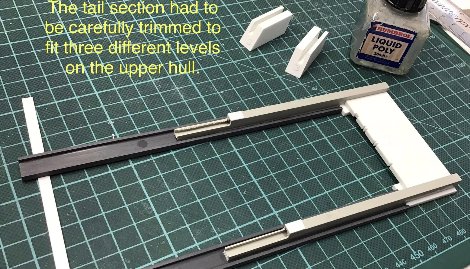
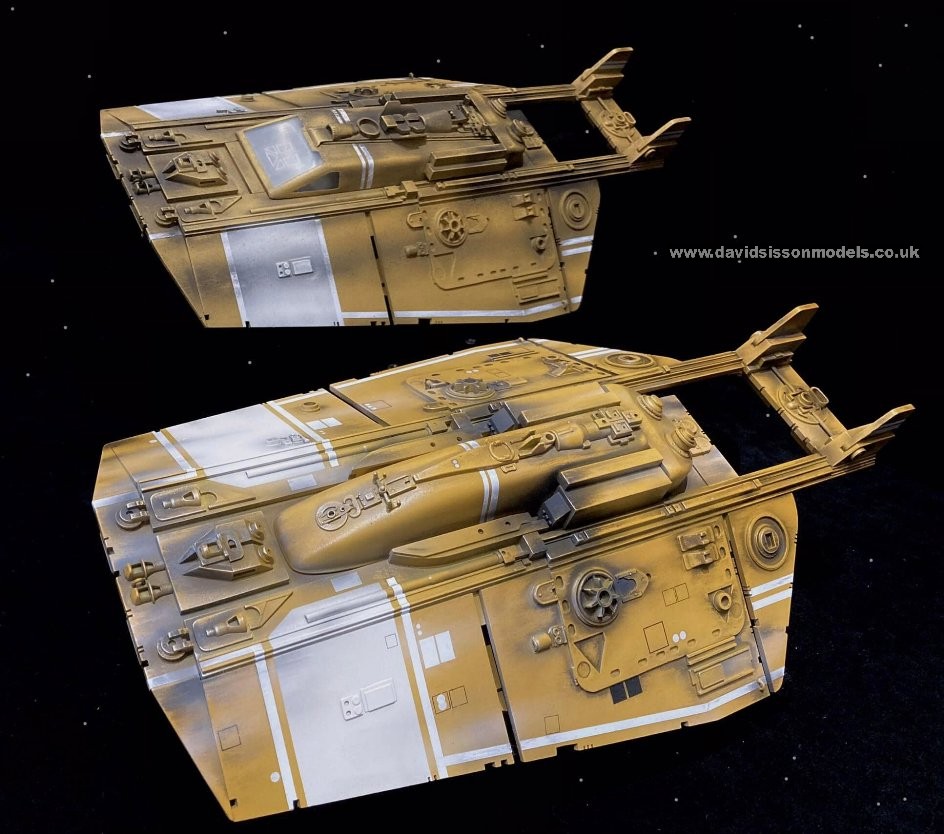
| One of the more tricky parts of the job was understanding what the tail unit was made from, all the various layers and tubes, and how it fitted onto the hull. It actually joins on three different levels and took some experimentation to replicate. You can have all the photographs in the world but often it is just so hard to understand exactly what you are seeing, especially when its all painted the same colour and covered in dirty weathering! |
 |
 |
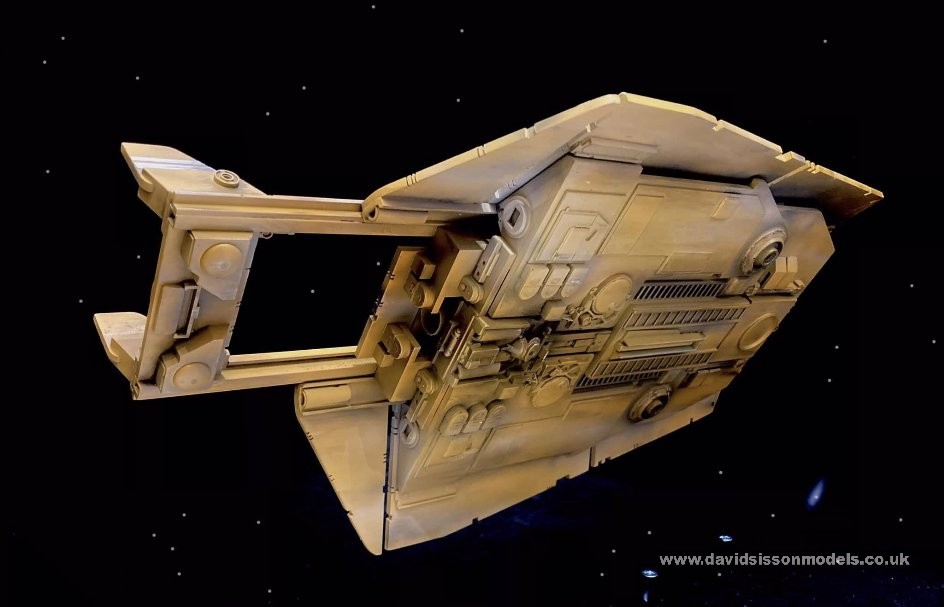
| Above
left; Unfortunatlely sometimes things don't always work
out. The added side panel is a big kit part from a
'Matchbox/AMT Double Trailer' lorry kit, and you need one
kit per model. As a result I cast up some copies to save
money, which actually worked far better than I expected,
but during the build I noticed some edges were begining
to lift slightly off the plastic hull surface! So I
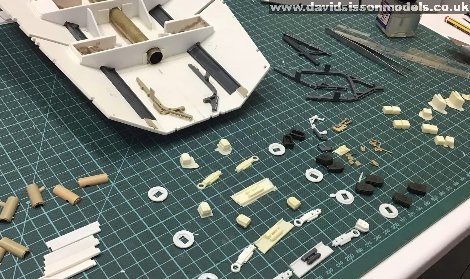
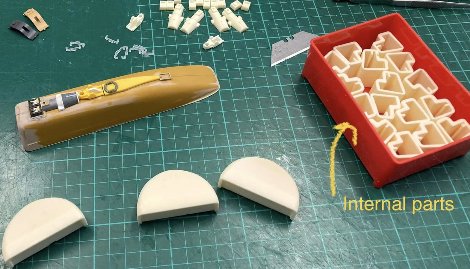
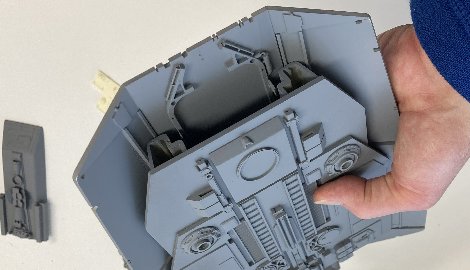
removed them and had to buy more model kits. Above right; making some of the weird unknown shapes. Theres a big piece behind the cockpit canopies that has never been identified, so I scratchbuilt one in plastic and car filler and moulded it. Likewise there are some short lengths of odd shaped tubing inside the front of the model so I again made master patterns in Plasticard and moulded them. To minimise any problem in the casting stage I made these parts shorter than required and doubled up the castings to create the finished items. |
 |
 |
| Above
left; the ZEAF cockpit canopy was originally made from a
spare plastic moulding of the canopy for the Treehawk
model. As luck would have it I am currently reworking my
Treehawk replica and so had a new canopy master pattern
that I could use. One minor detail that few people would
notice, or even care about, was that because the original
was a vac-form moulding there was a slight lip at the
base around the front end, an imperfection where the
vac-formed plactic is stretching out to the rest of the
unused edging of the origianl sheet that was cut away.
Because it was clearly there I decided to recreate this
lip using a thin piece of plastic sheet to give the
outline and a tiny amount of filler to blend it in. A fair number of the pieces on top of both canopies are unknown kit parts and so had to be recreated from other similar looking pieces that could be cut up and reshaped to match. The wider two-seat canopy was formed in clear pieces of thin Perspex, and sanded to shape, then polished to get the window areas back to clear. Although not too clear, as I prefer windows to be a little bit diffused to obscure the interior details. Clear windows on a model are often a weak point as they are usually too clean and toy-like in there clarity, exposing the interiors and the figures within. I always liked a scene in the television series 'UFO' where a Shado Mobile drives straight up to the camera lens and even though you could see through the windows you could only see vague shapes of the crew, not painted figures. |
 |
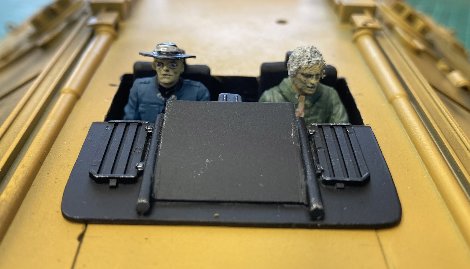 |
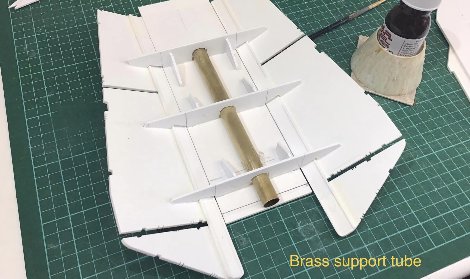
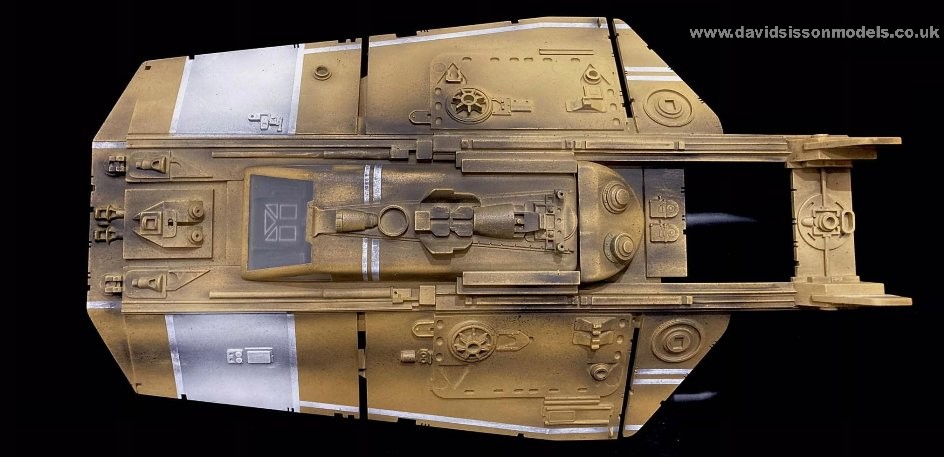
| Above left; test fitting the bottm panel to make sure that it fits and is straight, as you have to install a big kit part at the front to join up the two halves and so it can't be too far forwards or back. The bottom panel sits on the internal bulkheads that hold the upper hull in shape, and on those two weird shaped tubes at the front. Above right; Figures are of Lord Tempo and Youngstar from the episode 'My Kingdom for a Zeaf', and made by modifying 1/35th scale soldiers. |
 |
 |
| Finally the models were
built and I could begin painting and what a nightmare
that was! Finding the right paint, or usually just a
paint that looks right to you, is always a nightmare
especially when you work from photographs or by watching
the episodes on TV. Although I had seen the actual model
it had been repainted during it's past modifications and
was different to it's original appearance. So I actually
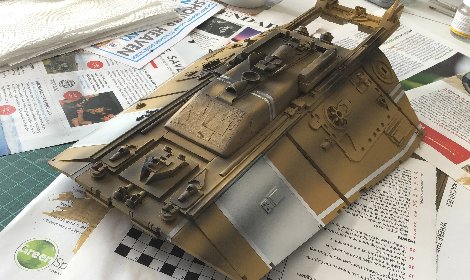
had two slightly different colours to find. Joy. The model was painted a 'Mustard' colour so I began looking for cans of paint spray, both easily available and special order... and I ordered quite a few! Then I had to try each one, and over different primer undercoats, to see which looked best. After a great amount of testing I decided that the only available car paint in the shops, Vauxhall Mustard Yellow on a grey primer, was a decent match to the original paint.....but only if you didn't put too much on! I initially put this paint on the twin-seat model as well, but it just didn't look right so I started hand mixing paints and applied this with an airbrush. Eventually after painting the model eight times I found a shade that I could live with!!! Of course you have to also take into account that the added weathering will alter the final colur too... and the lighting in the room you display it in. Weathering these models was also interesting, as it wasn't just the shade of paint that was different on the ZEAFs but also the weathering techniques used. Same model but different model makers, different skills, different times of production. When it was first built the ZEAF had a more intricate paint and detailed finish, more white Trimline tapes and Letraset markings. The weathering was finely sprayed on with black, blue, and white shades which I could replicate with my airbrush. The
later modified twin-seater by comparision was a mess, a
much more simple style of painting and weathering,
possibly done in a rush with a spray gun that spattered
the model in black paint particles. My airbrush simply
couldn't mimic this 'look' and after a few failed
attempts to 'mess up' my model in this style I resorted
to gently flicking black paint off the end of a
toothbrush, and then repeated the process to build up the
effect. |
 |
 |
 |
 |
 |
 |
 |
Scratchbuilding the ZEAF; Text and photographs copyright David Sisson 2024