![]()
Scratchbuilding Thunderbird 5 from Gerry Anderson's classic 60s TV show
|
||
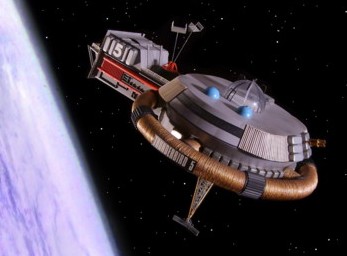
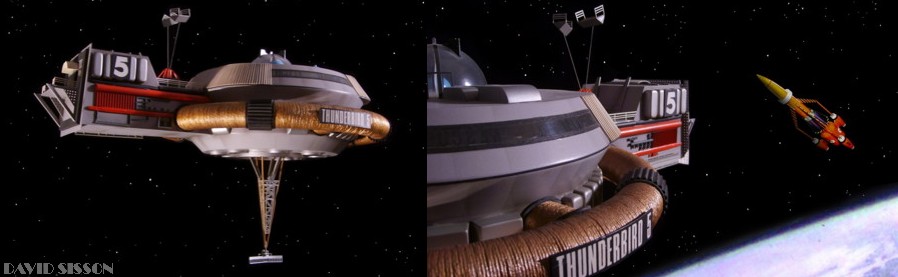
Compared to the other colourful rescue vehicles TB5 was 'a bit rubbish' and not exactly the first toy that you would want for Christmas. The Special Effects Director, Derek Meddings, designed all the other vehicles but was then stuck for ideas when he got to creating this one. Then he spotted the Roundhouse model being built (which TB3 launches through) and used it as a basis for TB5 - so there you have it, Thunderbird 5 is a house in space, with a funny ring round it. |
||
 |
||
|
||
 |
The problem with the Thunderbird
vehicles is that you have to have them all, its no good
just having a few, you've got to have the whole set - and
that means building TB5. The problem became apparent
years ago when I did several displays one of which was in
a shopping centre where a mother brought her tearful
child up to me to ask where was Thunderbird 5? Because
it was 'his favourite'!!!
The BUILD by David Sisson The first job, as always, is to draw up a decent basic outline blueprint. Luckily there only appears to have been one original studio model so we aren't messing about here with the problem of trying to idealise two or three different overall shapes. The model was however redetailed at one stage, probably for the feature films, and it was also damaged from time to time (bits just drop off!) which results in a number of more minor surface detail variations. Again you can just pick the ones that you like. |
I often prefer to build my replicas to the same size as the original studio models, especially when those models are covered in model kit part detailing. Being able to just go and buy the model kits makes my job easier and leads to a more accurate looking model. However TB5 is quite a large model and I really didn't want a big replica filling my display room, so this time I just picked a size of around 23 inch in length. Profile photographs have been available
for many years and the craft is quite a simple shape so
the blueprint didn't take long, however there is one big
problem with this model and most people think of it
straight away - how do you make that ring? Normally I tend to use a lot of plastics in my model making but here I decided to use wood, which would also give me a more solid finish - I also had some off cuts laying about in the loft so it would also make the model pretty cheap. To construct the main centre hull I
just cut five discs from plywood sheeting and then
assembled them on top of each other using blocks of
hardwood to space them out. These wooden blocks would
also be used as anchor points for the later addition of
the ring and to create a strong locating point for a
model stand. Also one long length extended out of the
centre body to hold the docking extension, which I
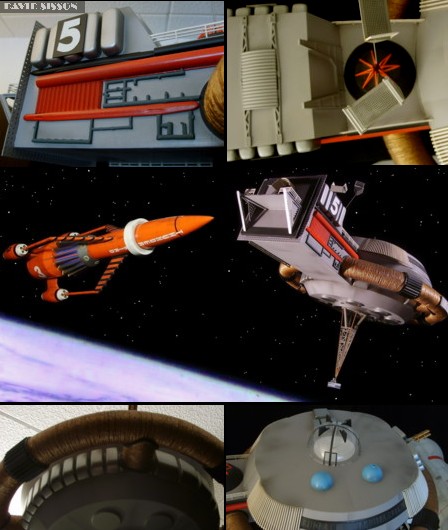
fabricated from Perspex sheet and Plasticard. The discs were initially just glued into position, then screw fixed together with the screws in the top and bottom having to be recessed and then filled over. The sides were now filled in with pieces of thin Balsa wood. The vertical centre section was just plain Balsa, but for the three angled surfaces the Balsa was set at a recessed level and then skimmed over with P38 car filler, which was then sanded smooth. Once this was completed the whole piece, Plywood, car filler and Balsa, was given a coating of SP113 epoxy resin and then again sanded smooth. The two big window areas were now marked onto the surface and then drilled out. The windows themselves could just be cut from plain clear sheet, the only tricky bit being that you have to add the words 'INTERNATIONAL RESCUE' on the inside using black Letraset. I didn't need to recess the windows, just overlap them onto the surrounding hull edges, as trimline tapes added at a later stage would create a clean finish. You can tell from this picture (right) that I made this model a long time ago as I still have hair. Nowadays the only thing I've still got is the jumper, I really must throw it away! Another noticeable detail on the TB5
model is the series of moulded blocks that are glued all
over it. These parts appear to be thin plastic throwaway
packaging for some unknown item that they must have used
quite often at the studio. Another strange design on the model are the four sections of vertical white strips, I have no idea what they are supposed to be? They are not level with the hull but bulge outwards, so I had to glue some crescent-shaped pieces of Plasticard onto the model and blend them into the rest of the models surface. Further work was done on the docking port; here I could actually use some of the kit parts that were used on the original model by simply cutting them down in size. The perforated panel on the end was just a normal square piece of Plasticard with 200+ holes carefully drilled in it. The model was now spray painted with its basic light Grey finish and I could start adding some of the other detailing, such as the white strips that were cut longer than required and then trimmed to size after the glue had properly set. It was now time to tackle that number
one problem of how to make the 'ring thingy'. The chances
of finding something that looked the same were almost
non-existent so I would have to scratchbuild it. I went
down to a couple of DIY centres in search of pipes and
found some corrugated bendy pipes for bathroom washbasin
drains. The pipe would be the right diameter and could
bend, but unfortunately would not hold a shape and all
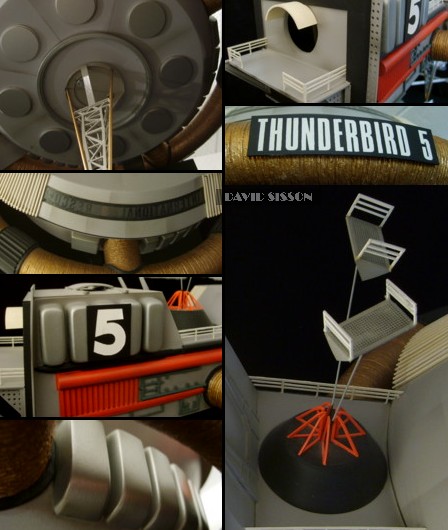
the groves would need filling smooth. Finally the intricate 'wire' wrapping
was applied but not with wire. My first attempt was with
metal wire but I found it to be a nightmare as the wire
would not go around the pipe and stay in position. After
several goes I resorted to using a fine string and PVA
adhesive. PVA adhesive was applied over all the thread and string during the process and when it dried out the whole assembly had quite a hard surface finish, which was then spray-painted. Three shorter sections of pipe were cut to connect the ring to the rest of the model. Matching holes were cut into TB5's centre section to expose the hardwood blocks and steel screws were embedded into these to form anchor points, that the three pipe supports could be fixed to. It was then just a matter of trimming and adjusting these supports until the ring fitted into position. Once this was done they also had to have the string wrapping applied and then finally rubber sealing rings covered the joins - which conveniently came with the plastic tubing. The four bigger ring sleeve pieces were fabricated from plastic sheeting and covered with short pieces of plastic edging strip. They aren't glued to the ring and can be moved, which helped when I painted them. Other surface detailing could now be added, all of which were painted before being glued into place. A long search through all my model kit boxes provided a number of very similar looking parts that could be used on there own or adapted. On the sides of the docking port it’s actually the sprue that is used instead of the kit parts, and I've certainly got plenty of that to spare! The bigger red pipe is actually a hardwood strip, coated in sanding sealer, and glued to a slightly wider strip of Plasticard. The clear dome was simply ordered from EMA model supplies, then outfitted with a few bits of plastic and black Letraset tapes. The main aerials were made from modified model kit parts and sheet plastic, with metal mesh for the intricate detailing. The final assembly was simply done by heating the ends of the two metal wires, over a blowtorch, and then pushing them into the plastic parts, where they melted there way in and then locked into position as they cooled. One BIG problem with Thunderbird 5 is
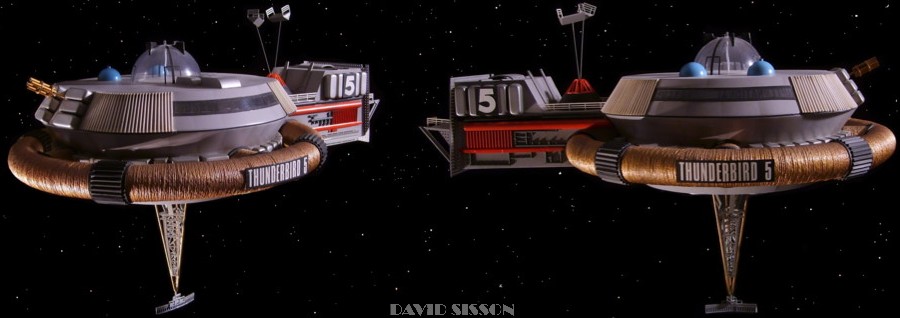
that you simply can't put the thing down, which is rather
a pain and a problem for models or toys! It's possible
that this simple problem is the vehicles biggest downfall
and why many people don't want it in their collection as
it just doesn't fit on a shelf. Finally the 'Thunderbird' markings were added. The number fives on the side are just cut from adhesive paper labels but the full name on the ring was done using Letraset. Unfortunately I didn't have any white Letraset so I just used black lettering on a white piece of Plasticard, and then spray-painted it all matt black. When this was dry I used masking tape to carefully pull off the Letraset and expose the white plastic beneath. |
|
The model has been damaged over the years and is getting slightly tatty in places so I'm thinking about stripping it down and rebuilding it at some stage, but for the time being it doesn't look too bad - and it does mean that I have the full set of Thunderbirds at long last. |
 |