![]()
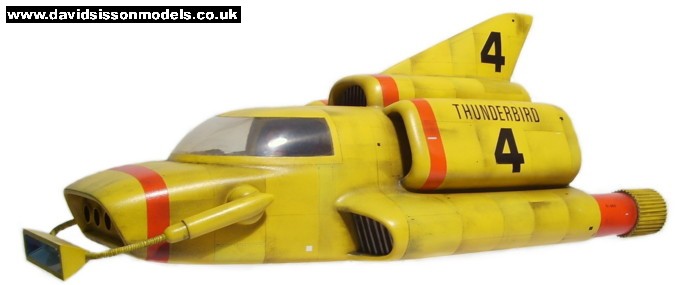
Scratchbuilding Thunderbird 4 from Gerry Anderson's classic 60s TV show
|
||
| Like TB2 several special effect models represented this craft during the course of the long series and as usual they all varied in shape and detail. One small model was a bit thin and had a large canopy that I didn't like and another larger model had a small canopy that looked all wrong. So at the end of the day, as with all Thunderbird models, I only really liked the original version that always featured in the opening and closing credits. Luckily the available profile photographs featured this particular model and I was able to draw up a decent blueprint to give me a replica about 50cm x 21cm x 19cm. | ||
|
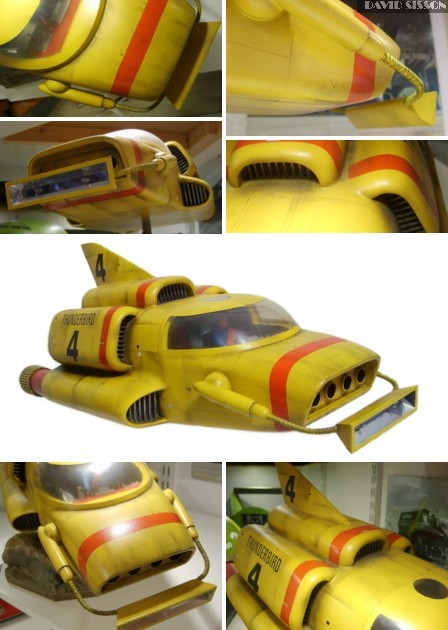
The Build by David
Sisson Like TB1 and TB3
building the basic overall shape is reasonably quick and
quite easy. Here I created a hollow master from 1/2"
balsa sheets. The three-vent/engine modules were made
separately, with the two side ones being glued into
recessed positions cut into the side of the hull. |
The cabin is a separate piece made from a solid block of Balsa. The balsa was easily sanded to the required shape and treated with a coating of SP113 epoxy resin to seal the wood. Then the surface was sanded smooth with wet & dry paper. The side engine tubes were added at this time using plastic tubing wrapped in thin Plasticard to blend them into the main body. Five partial plaster moulds had to be taken, one each for the front and rear sections and then three around the middle - the central area on the bottom wasn't cast to allow a space for access to the interior. The red line marks where the various plaster casts extend to. These days I use a lot of different materials in my models but each one had to be 'discovered' and was used to a greater degree than normal at the time to ascertain its abilities. As a result when I look at my old models and their construction techniques it's like looking back at different fashions. There was my 'Balsa' phase, more recently my 'MDF' phase, but with this model, back in the early nineties, it was definitely my 'P38 polyester car filler' phase! That's because this whole model, apart from some bits of plastic, is just car filler - as you can see from the 'very rough' casting in the photos at the lower right. (They don't normally look this bad.) The filler, mixed with a small amount of resin to make it slightly easier to use, was just smeared into the plaster moulds and then the finished castings superglued together. A lot more filler, applied to both the inside and outside, locked the parts together and filled in all the gaps. This mess was then rubbed down and shaped with wet & dry paper. The one good reason for doing this was because I was unhappy with the shape of the master and wanted to keep altering the body, and the P38 gave me a thick shell to play with where thin fibreglass castings wouldn't. The engine inlet grill areas were now formed by lightly gluing Plasticard inlet shapes into position and then covering them over in - you've guessed it - more filler. Once the filler had set these plastic pieces could be removed to leave the smooth openings. The rough outer edges now just had to be sanded to match the surrounding bodywork. The model was now coated in spray filler and rubbed down to a smooth finish with more small bits of filler and knifing putty filling any airholes in the surface - a process that had to be repeated a number of times to get the desired finish. The thick top fin was formed by sandwiching more filler between two Plasticard outline shapes, then trimmed and sanded to the required dimensions before yet more filler, and superglue, blended it to the top of the hull. The front of the model had not been formed as this area has a recessed bulkhead which I formed using thick Plasticard with torpedo and equipment tubes made from sections of brass pipe. The canopy was made from 0.75mm transparent Plasticard by heat-forming it around the balsa master, which had been treated with resin to fill in all the wood grain and create a blemish free shape. It was now time to create the internal details and the cabin was blocked out in Plasticard, with kit parts for instruments and a modified plastic figure for 'Gordon' the pilot. For my first failed attempt at a figure I tried to scratchbuild him in the shape of a Thunderbirds puppet - bad idea, looked rubbish! The inlet grillwork was formed from plastic pieces, painted separately from the rest of the model, and were only added at the end of the project. The final detail to be made was the front light trough fabricated from chrome plated Plasticard and connected to the body using plastic tubes (which were bent to shape after warming them up using a paint-stripping heat gun) detailed with modified kit bits and wire. At first the unit moved up and down but I soon got tired of it flopping about and glued it into one position. Finally the model was painted with cellulose motorcar spray paints, mostly Peugeot/Talbot Hertz Yellow with Ford Sunset Red for the stripes and engine tubes. Thunderbird lettering was done with Letraset transfers and the number 4's were cut from self-adhesive paper labels and spray painted black. Finished ............................... but not quite! Often you can only
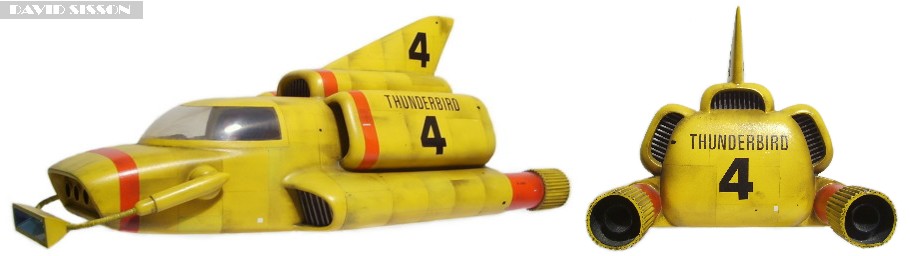
really tell if the model is right when you get to the
very end and can hold it in your hands and compare it to
the publicity photos. Find a decent large picture, close
one eye, then move the model around in your hand until
you get its contours to match the one in the picture
perfectly (or very close). Succeed and you can put the
model on a shelf to display - Fail and its time to strip
it down and redo it. Picture right; one bit that caught me out is the rear top vent, it doesn't sit cleanly on the top of the model, the rear bulkhead actually curves into the vent opening resulting in the edges of the vent extending further down the back and thus having a bigger appearance. |
|
 |
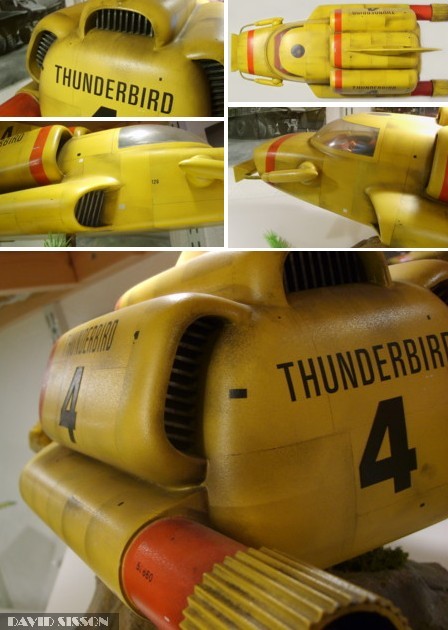
After three attempts the models current look. I always thought TB 4 looked best when it was really filthy, like in the episode 'Desperate Intruder'. So the model was dirtied down using black powder paint sealed on with clear laquer. Panel lines are just drawn on with a black biro. |
 |