![]()
Building Starbug from Red Dwarf............ again
|
|||||||||
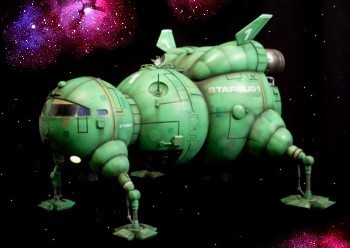
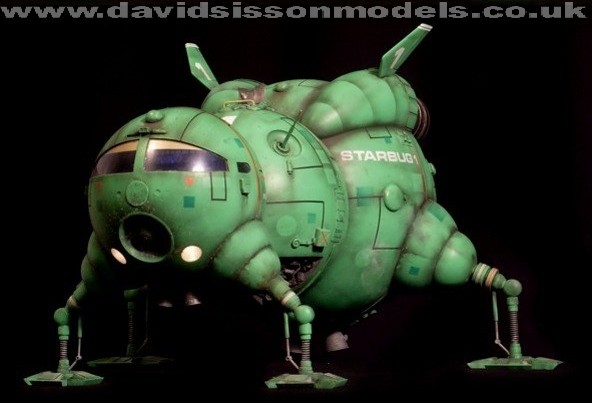
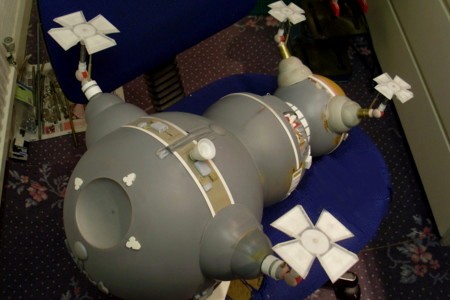
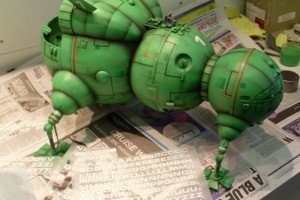
| One of those models was my first 'Starbug', a model that was pretty good but had failed to really live up to my expectations, so it went. After a year had passed, and with the new 'Red Dwarf''series 10 approaching, I decided to give it another go and build myself an improved version. This would be exactly the same size as the first one but with improved detailing and benefiting from my improved model making experience .... which really just means that I'm just older and wiser .... or just older! | |||||||||
|
 |
 |
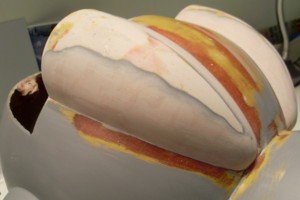 |
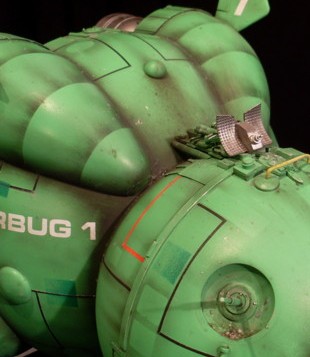
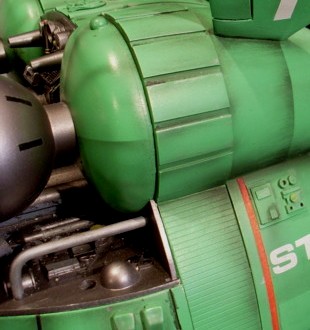
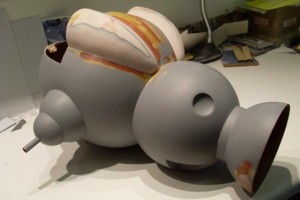
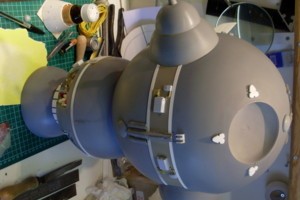
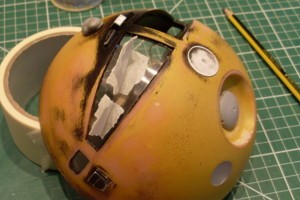
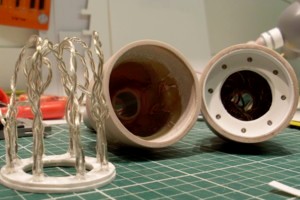
During the construction of my first Starbug model I had paused briefly to make plaster-of-Paris moulds of the complex multi-sphere main hull, just in case I ever wanted to build a copy. This now came in rather handy, as I was able to create a new centre hull from just two fibreglass castings, with two more hemisphere castings for the front and rear ends. Luckily I also had most of the plastic domes (EMA Products), a lot of spare bits, and various templates collecting dust in the attic. Another plus were castings of the engine fairings, which had taken so much effort to make on the original build. These gave me the basic shape straight away but I still needed to blend them into the hull and 'tweak' the shape slightly, making them a little bit fatter. The two parts were glued to the hull, with polyester car filler creating a smooth join - also three screws had been half embedded into the hull to act as anchor points, which the filler and extra glue could lock onto. |
 |
 |
 |
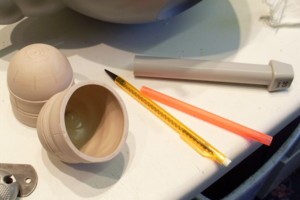
A rubber mould had been made of my
original scratchbuilt engine bells so I used that to
slush-mould two new ones - which involves adding
fibreglass resin to the car filler until it reaches a
more liquid state. After adding the activator the mixture
is poured into the mould and you then have to rotate the
mould for a few minutes, as the filler sets, to get an
even thickness around the sides. |
 |
 |
 |
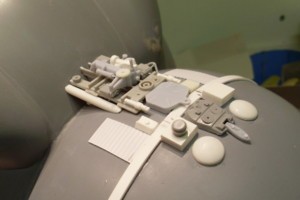
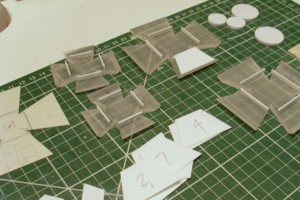
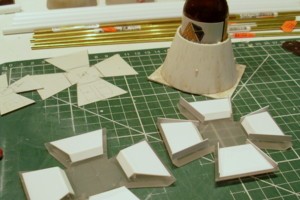
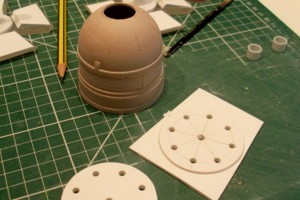
Here other detailing is added to
the main hull, again using a variety of modified kit
parts. The original studio model apparently used parts
from some sort of Japanese robot model kit, so a number
of the parts are rather strange shapes, especially those
on the rear end. As a result I had to make each of those
from thick plastic sheets, layered up, cut and then
sanded to shape. |
 |
 |
 |
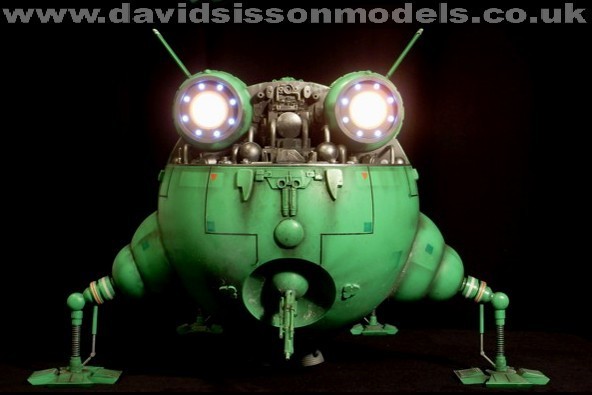
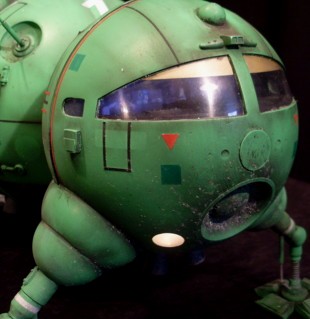
My original trick of using a
photograph of the actors, to fill out my pilots cabin,
was again repeated here. Although this time I could
upgrade the effect by using my computer to create the
final image instead of just cutting up actual photographs
like I did back in the 1990s. |
 |
 |
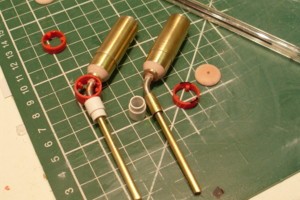 |
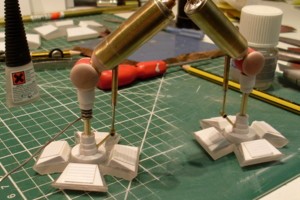
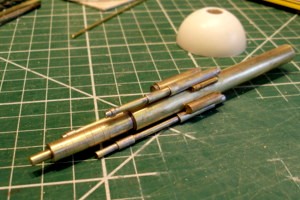
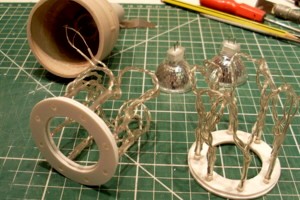
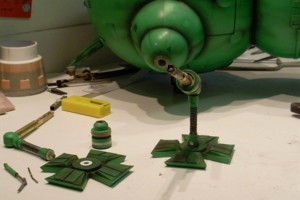
Building the four legs involves a
fair bit of work, and as they support the model they have
to be pretty strong too so I build them using metal.
Brass tubes are embedded into the main hull and then the
four legs can be built and attached to them. Last time I
used a combination of quite a few different sized Brass
tubes to create the lower leg sections, but this time I
just had a Brass rod core and clad the outside using
plastic tubes. This was easier to do but also looked
better as the previous thinner walled Brass hadn't
replicated the chunkier look of the studio model. That
was one of the things that I hadn't liked about the
previous models legs, but there were also a few other
things. The 'knee' joints were done using small domes on
the first model but that was a mistake, as it should be a
central core with elliptical domes on the ends which
gives a different look. Also the 'spring' area was too
wide on my first model, so a thinner Brass core was used
on this model to fix it. |
 |
 |
 |
 |
 |
The front legs were fully built and then placed into the support tubes, then I drilled though the sidewall and insert a pin to lock them in place. Then the rear legs were assembled, with the soldering being done with the parts in situ to get everything level. Once the Brass core was fixed the outer plastic detail could be added. Below: The big rear antenna was assembled from Brass offcuts - my reference here was rather sketchy and so I watched the episodes and freeze-framed shots of it landing but could not really note the detail precisely, so it is more an invention of mine in the style of the original! |
 |
 |
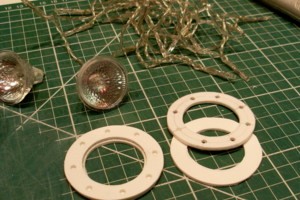 |
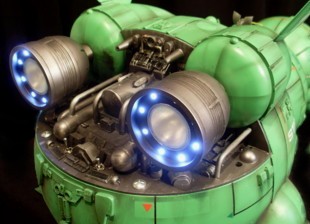
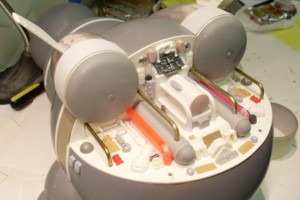
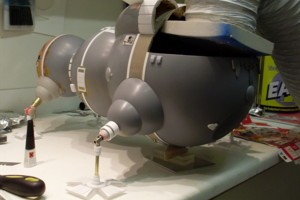
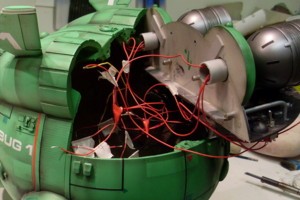
The big difference with this model was going to be added lights. I wanted the front 'headlights' to work, plus have some lights in the cabin to illuminate the photograph of the crew. While I was doing this the question about the engine exhaust detail had to be decided, and adding lights here also seemed to be a good idea. The Engine bells were a slight problem because there are two ways of doing it: normally the SFX model had halogen lights fitted to create the glowing exhaust effect, but they look odd when the engines are off. As a result during some scenes the open bell ends were blanked off with just a ring of small holes inside for detail. My first idea was to put small LEDs in this ring of holes but it looked a bit feeble, so I then added a smaller halogen bulb in the centre to make it look better - so I've basically mixed the two designs together. |
 |
 |
 |
For this I used a set of cheap
indoor Christmas tree lights. These were battery packs
with 20 LEDs attached; simple things often used for
dressing small tables or office desktops. I just had to
cut up the wires and move the bulbs around, with eight
going into each engine and four going off to the front
cabin. This involved a simple bit of soldering and the
big bells gave plenty of room for the multitude of wires
- the only thing that did catch me out for a bit was that
(unlike normal light bulbs) LED's apparently have to be
wired in one direction only, or they don't work. |
 |
 |
 |
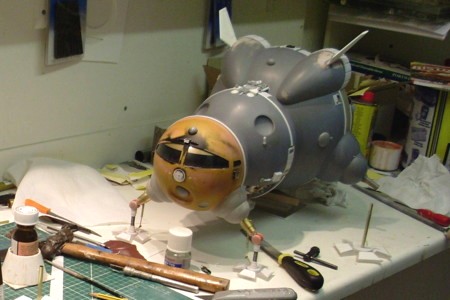
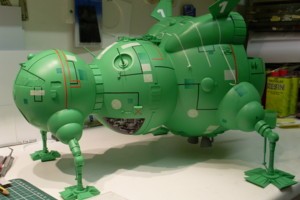
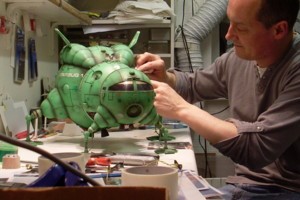
The model was again painted using
automotive spray cans from 'Halfords', I seem to like
their paint more than some others at the present time -
the colour being Ford Signal Green, with Vauxhall Mistral
Grey for the engine section. Weathering started by
airbrushing black enamel paint onto the model, often over
masking tapes to create the panels, and also the pattern
effect on the rear fairings. This was rubbed off with
wire wool to tone down the initial application, then
further layers were added until I was happy with the
effect. Further weathering was then applied by rubbing
black powder paint onto the models surface; again I could
keep playing around with this until I was satisfied. |
 |
 |
 |
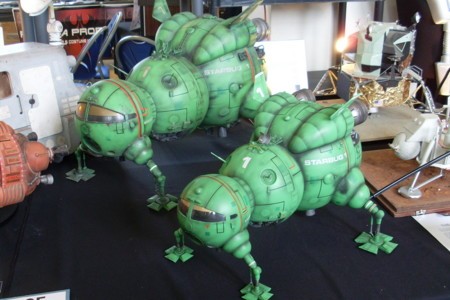
Above: the mess of electrical wires for the various bulbs, the bits of tape are numbered to identify which wire belongs to which circuit. Taking a leaf from the original build the engine bells are not fixed in place but simply inserted into the locating holes, which allows you to adjust them. Unfortunately after displaying the model at Smallspace 2012 with the original model (see below) I realised that the rear legs needed to be further out by a few millimetres - yes I know that it doesn't sound like much but it was noticeable! This meant that I had to break apart my securely fixed model parts and adjust them, which caused a bit of a mess (above right). My mistake was the assumption that the leg comes out of the models hull inline with the domed parts, but it actually comes out at a slight upwards angle. I could modify my model to match but my big concern was that I would have to change the angle at the 'knee' joint to keep the lower legs perfectly vertical. This would have been major surgery, but then luckily I noticed that the rear legs do in fact flare outwards slightly on the original model (possibly due to weight), so this all worked out for the good in the end. Oddly this moving things from perfectly straight, or vertical, makes the model look better in my opinion. It makes it look more real and less artificial. Below left: My replica
with the bigger SFX version, I realised that much more
weathering was required at this stage. One difference was
that recent additions to Starbug have included additional
thin black lines around the windows, I'm not that fond of
this so mine has none. |
 |
 |
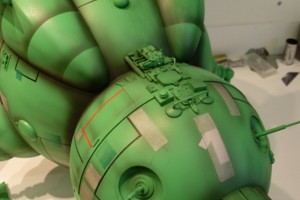
The model was ready in time for
several display events in 2012, however it wasn't
completely finished at that point. The model still needed
more weathering to get that 'bashed-about' look that I
wanted. I achieved this by blasting the model with
fireworks, the best being a Catherine Wheel! |
Back to INDEX PAGE ..........
Model, article and all photographs by David Sisson 2013