![]()
Rebuilding
and hopefully improving the 1970s Dinky Eagle toy
from Gerry
Anderson's Space:1999
 |
As a child in the 1960s, and early
1970s, I had often enjoyed playing with my various Dinky
toys especially those representing the fantastic vehicles
from the various Gerry Anderson television series (as
well as the good old Spitfire and Stuka from the film
'The Battle of Britain'). I had loved the SPV
from 'Captain Scarlet' and especially the Shado
Mobile from 'UFO', but when the Eagle
turned up I was less than impressed and so I never owned
one. This was due to my real love for the Eagle and that
as a maturing 13-year-old I was no longer impressed by
tiny metallic green toys!! |
 |
This was basically due to a model display I did in Papplewick in 2019 where the event organiser, Roy Palmer, thought that it would be a laugh to place his little Dinky toy next to my original studio Eagle miniature. I was surprised to discover that it got almost as much attention as my model, but I suppose that I should not have been too shocked as the average person will relate far more easily to something that they also had as a child than something that they have never seen before. This reminded me of the Gerry Anderson displays that I had done in the past with my friends Martin Gainsford, Bob Bailey, and Chris King, where we had all created a more varied display of models, puppets, and toys. Because of that I had recently started adding a few puppets, photos, and magazines to my displays but now I decided that it was time to start adding Dinky toys, so I went looking on ebay. |
 |
 |
The first question was
how much should I spend? As I planned to remodel the toy
I discounted all the expensive great condition toys and
just looked at the cheaper end of the market, which was
usually priced due to missing parts and play-damage, so
well under £100. Then there was the question of which
version to buy as there are so many different types due
to the variety of coloured plastic and metal parts.
Chrome engine bells seemed like a good idea initially,
but I decided very early on that I should remould all the
soft plastic parts in resin to get a better quality of
paint finish, so I then ignored that idea. |
|
 |
 |
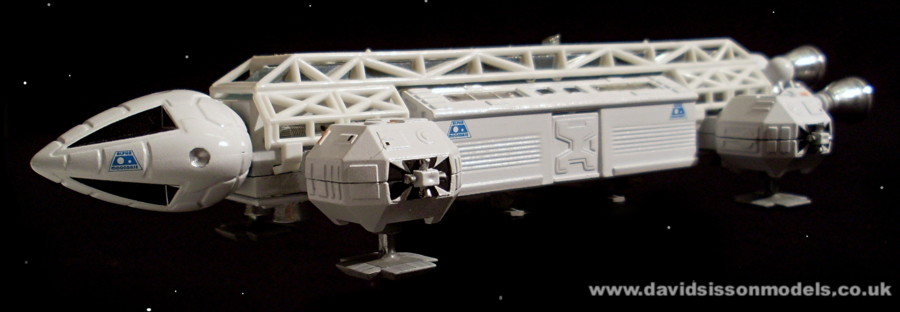
When the toy eagle
turned up in the post I immediately realised again why I
never wanted one, they are just so small! The distinctive
framework doesn't actually go around to the bottom of the
craft, theres very little detail on the main body, the
pod doors keep falling open, and that terrible
paint...... did I mention the metallic green paint? |
|
 |
 |
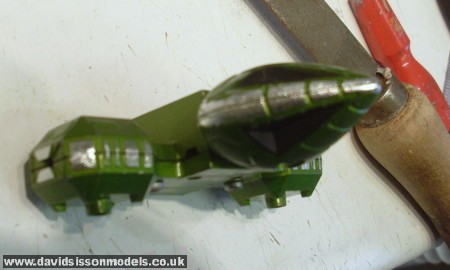
My first plan had
simply been to strip the paint off and then do a
straightforward clean up and paint the model in the
correct colours, however I then had a second plan to
super-detail the toy with many custom parts, but that
then seemed pointless because you can't really do that
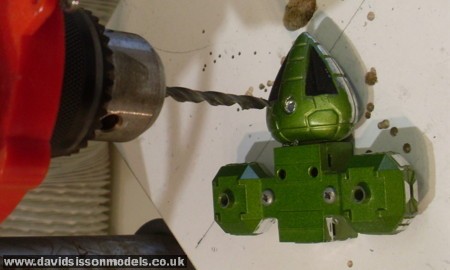
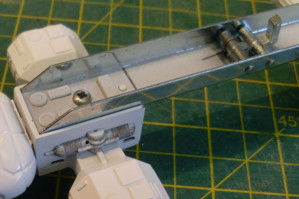
without throwing parts away and starting again! Above right: I drilled holes in the engine support ring, which turned the crude thick metal into two apparent pipe rings. |
|
 |
 |
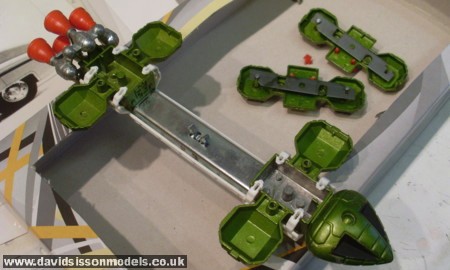
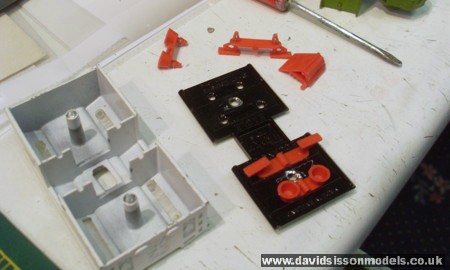
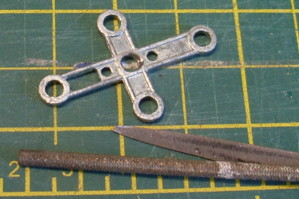
I began by dismantling
the toy and then coating the metal parts in paint
stripper, a rather long stinky process which took far
longer than the description on the tin claimed! One of
the biggest horrors of this toy was the front beak being
in two pieces , which resulted in the Alpha decal not
being able to go in it's correct position, the two side
sensor dishs being missing, and a great big ugly rivit
through the bottom! |
|
 |
 |
 |
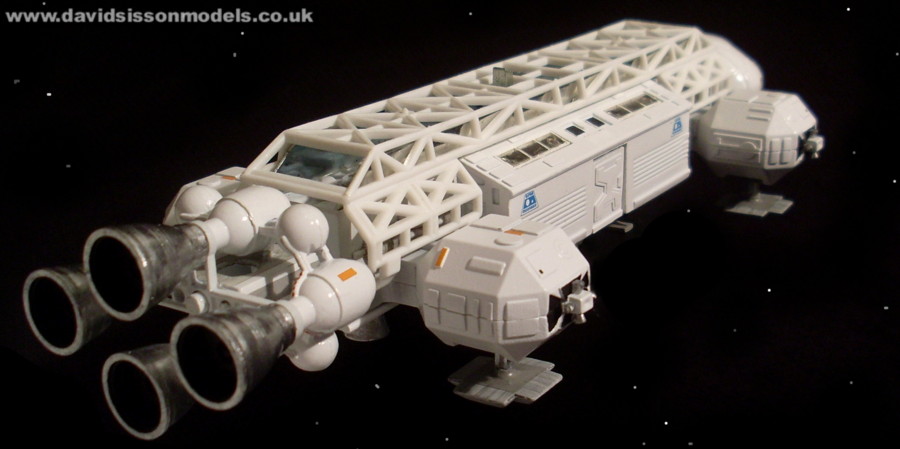
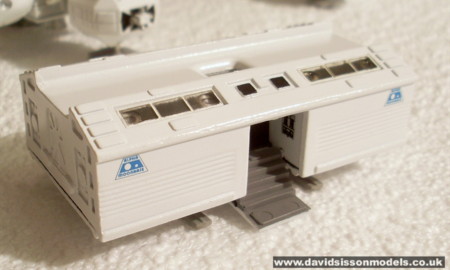
More simple improvements, the rear engine crossmember is a solid casting with the framwork filled in, an easy fix to drill out. The passenger pod window frames were carefully painted with my smallest brush but even so I still got bits of paint on the windows. Luckily as they are raised I simply waited for the paint to dry and used a scalpel to gently scrape the paint off. The result was quite neat although the quality of the plastic moulding makes it impossible to be perfect. My original plan was to paint the back of the clear plastic windows black, as per the original model, however a quick test proved that it didn't look very good. So I just painted the inside of the passenger pod black and it looks far nicer. |
||
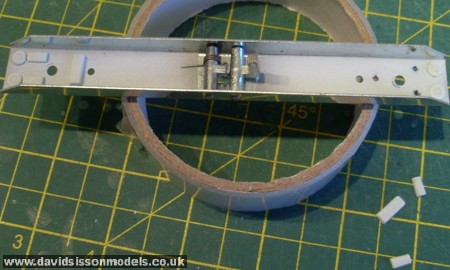 |
 |
The solid top shiney
metal spine of the toy needed some changes too. I was
going to paint it all but realised that the reflective
side surfaces hid the metal more effectively than just
painting it black, so I left them. However the centre
could be painted to match the top of the pod and cage
walkways. My first thought here was to add many small kit
part details to fill the blank surfaces but it just
looked plain wrong, so I resorted to a more simple
pattern of basic shaped parts that I mirrored at both
ends, matching the design of the toy parts that are
identical at both ends. |
|
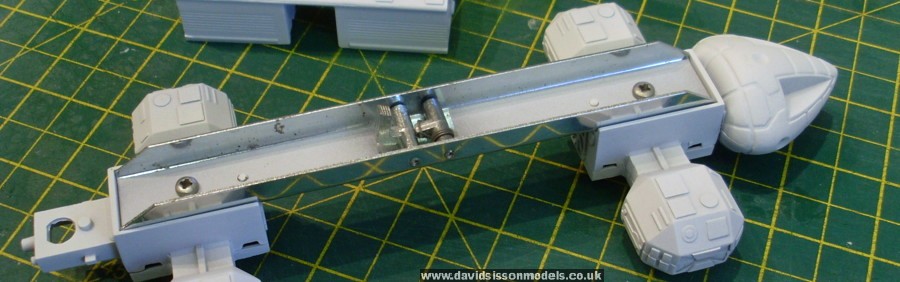 |
The toy was painted in grey zinc primer, then white primer. The centre hull walkways were masked off and then the beak, shoulder pods, and tail engine support were sprayed with Halfords brand gloss Appliance White car paint. |
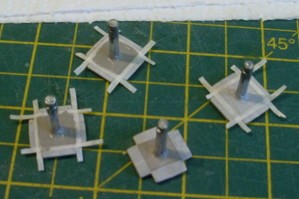 |
 |
 |
Primer didn't work on the footpads, so I applied two Humbrol grey paints, then used pencil to draw on the toes and weather them. The leg supports were also painted grey, then the surrounding black areas were cut from self adhesive paper labels sprayed with matt black primer. On the top of the spine I also drew in lines to represent where the passenger pod edges sholud be. |
||
 |
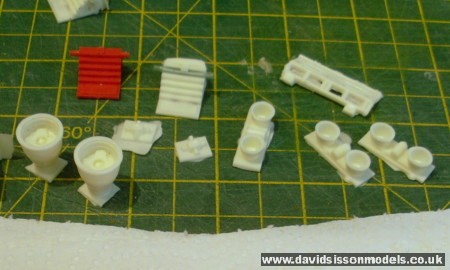 |
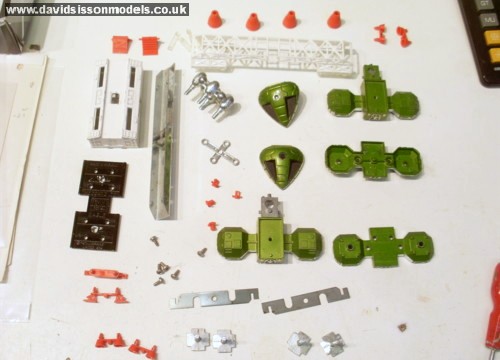
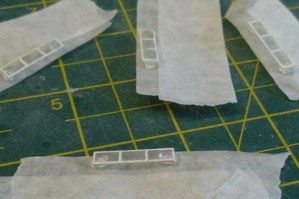
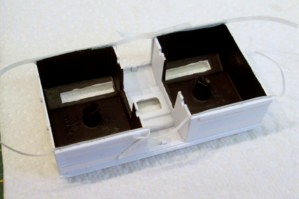
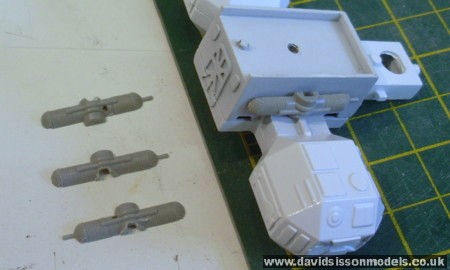
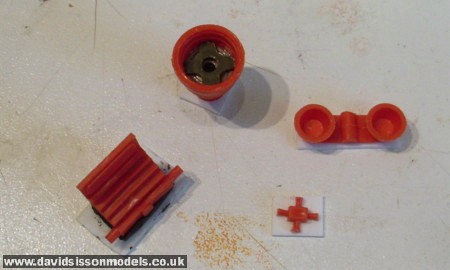
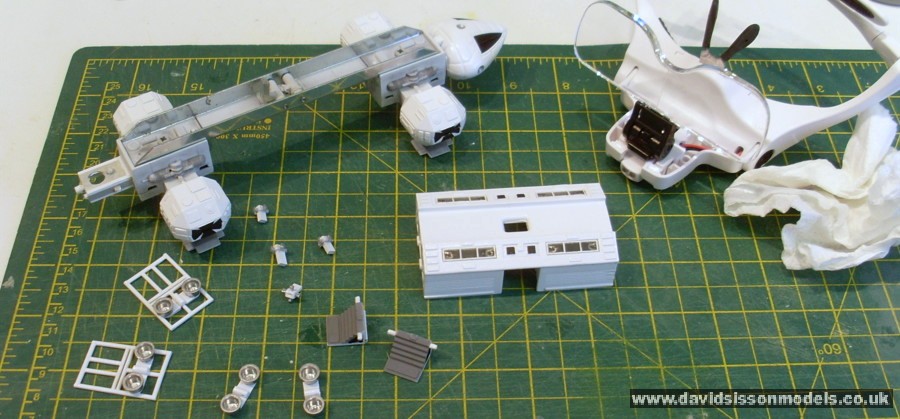
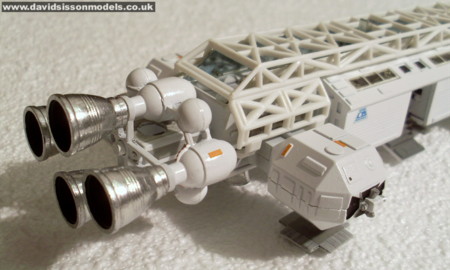
The best plastic parts
were used to make a silicone rubber mould, the engine
bell was slightly modified to include the inset baffle,
which also made it easier to get out of the mould. When I
cast the passenger pod doors I placed steel rods in the
mould to create the lugs, and placed a steel washer in
the door so that a magnet in the roof of the pod would
hold the doors shut. |
|
 |
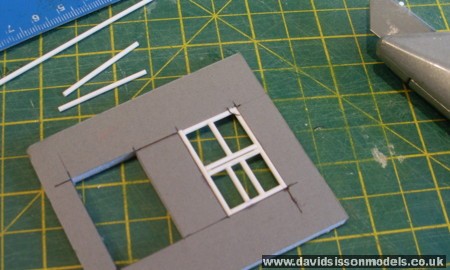 |
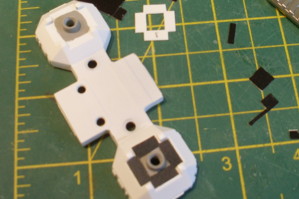
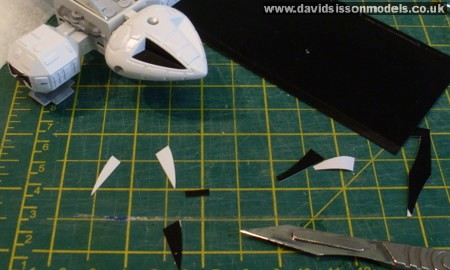
When people repaint
their Eagle toys the inset black window surrounds often
look very poorly painted due to the small size. To avoid
this problem I again used plastic templates to cleanly
cut out black adhesive paper pieces. |
|
 |
Another simple paint improvement
was the rear engine support, grey paint was applied to
the area while masking tapes protected the edges,
creating the simple appearance of pipework. |
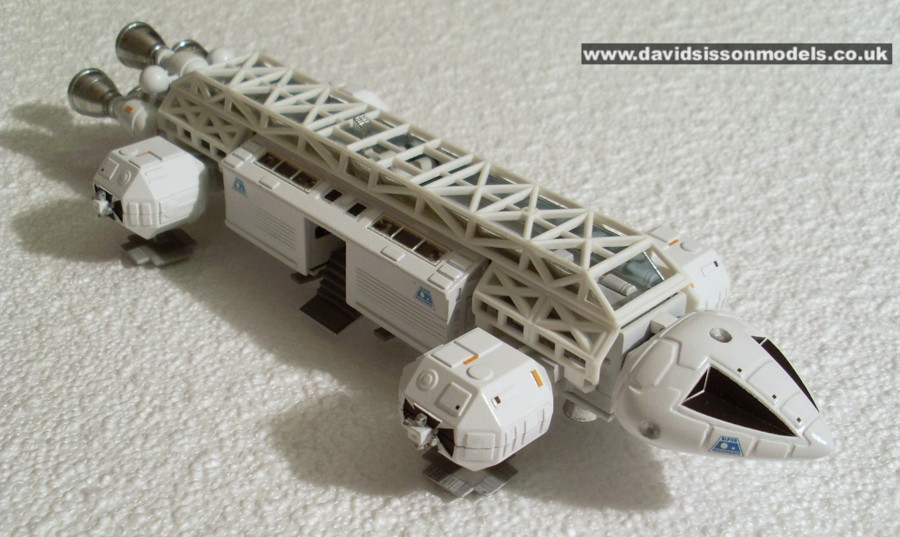
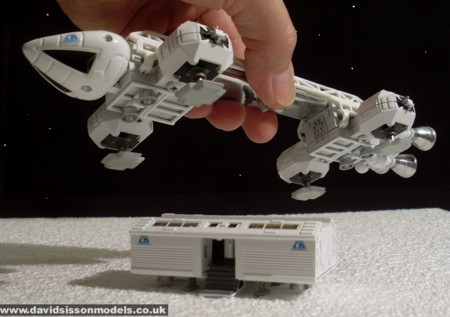
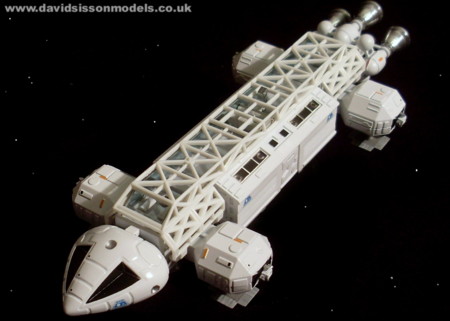
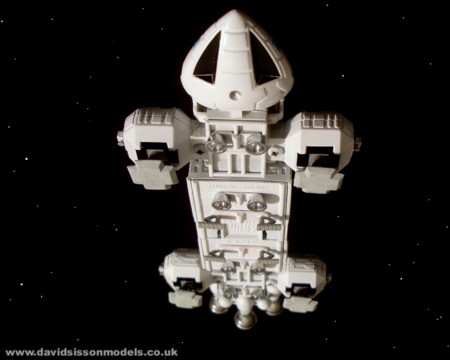
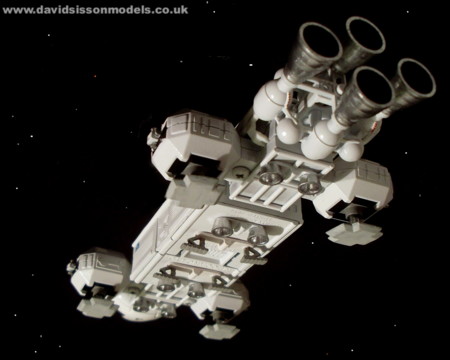
Dinky Eagle Gallery |
 |
 |
 |
 |
| Most of the paint is from Halfords car
spray cans, while the chrome comes from a Molotow Liquid
Chrome pen, but applied by brush. The legs on the
passenger pod were painted with Humbrol grey paint as
they are still the original soft plastic originals, as I
thought resin castings might break. Some weathering was applied to the top of the spine, footpads, and the walkways, but the gloss white was left clean and toy-like. Alpha decals supplied by Chris Trice. |
 |
 |
 |
 |
Text and photographs copyright David Sisson 2020